
Make Matryoshka Dolls With Eggs
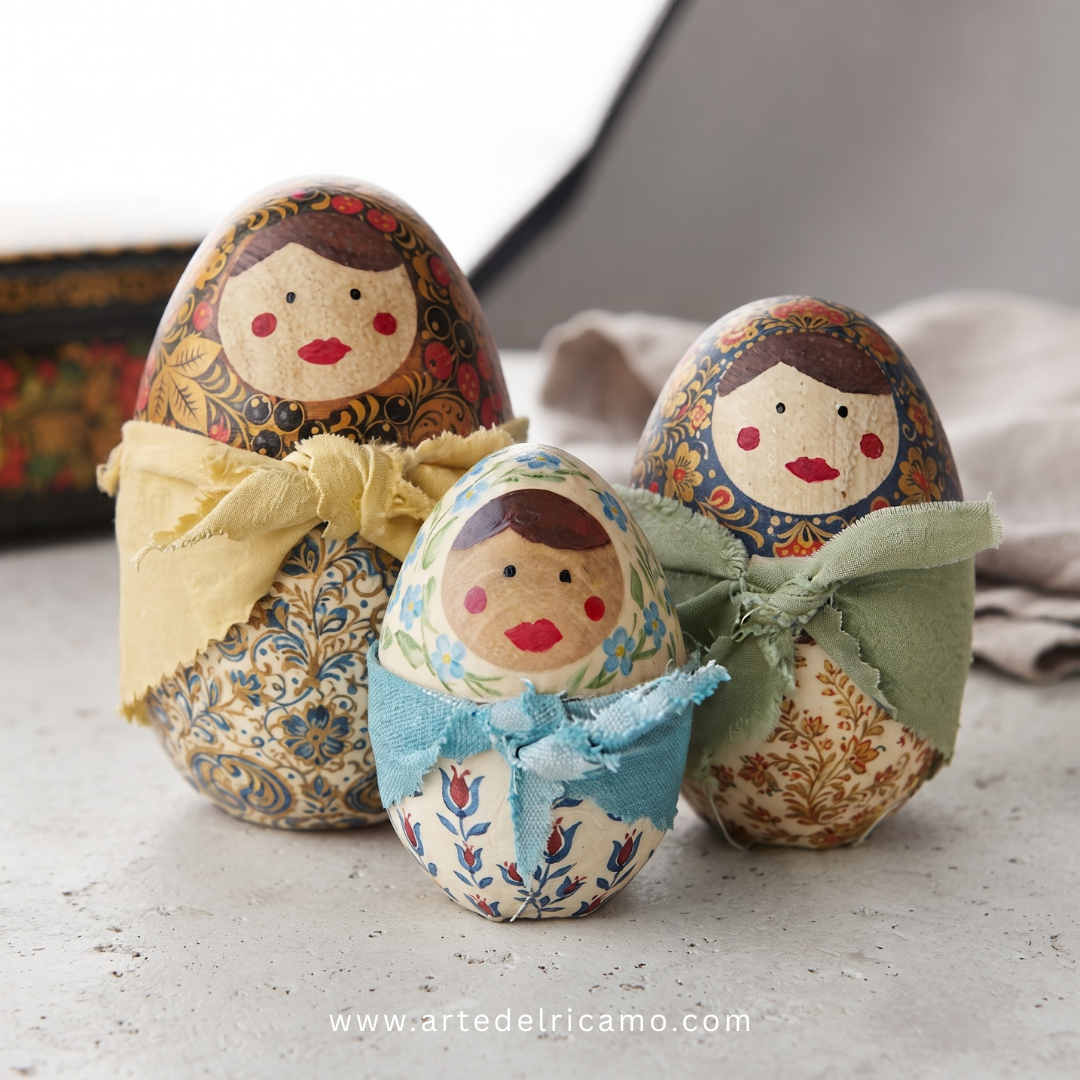
The charm of craftsmanship often lies in the ability to give new life to simple materials, creating objects that tell a story. Today, I’m proposing a delightful project, perfect for those who love creative upcycling and small decorative details: our “matryoshka eggs.” As you can see in the image below the final result is a set of colorful decorations with a traditional flair.

Materials Needed
To create this project, you will need:
- 3 wooden eggs of varying sizes (easily found at craft stores)
- Painter’s tape
- Exact-o knife
- Acrylic paint and small paint brushes
- Paint pens
- Spray polyurethane (I recommend a clear satin finish)
- Fabric scraps
- Scissors (and pinking shears for the edges)
- Multi-purpose craft spray adhesive
The expert’s tip: Before you begin, I highly suggest lightly sanding the wooden eggs. I noticed that an un-sanded surface makes painting more difficult and, due to the porosity, paint risks seeping under the painter’s tape. A small preliminary step that will save you time on finishing touches!
Step-by-Step Procedure
- The face mask: Cut a circle from the painter’s tape. You can help yourself by rolling the tape onto a cutting mat, tracing the shape, and cutting it out carefully. Apply the circle to the egg where you want to create the face, pressing down firmly on the edges. Measure where you want the paint to stop and mark it with a pencil, paint the area, and allow it to dry for about five minutes. Remove the tape and, if necessary, touch up any bleed-through.
- Painting the face: Use a small brush and undiluted acrylic paints to bring the expressions of your little matryoshkas to life.
- Top embellishment and protection: Use paint pens or a brush to embellish the top portion of the egg. Once dry, complete with a coat of spray polyurethane to protect the work and add a touch of shine.
- Fabric covering: Measure the circumference of the egg to cut the fabric needed for the bottom portion. Cut slits about 1″ long at 1″ intervals along the bottom edge of the fabric. Spray the back of the fabric with adhesive and apply it to the egg. Press the previously created tabs onto the base, alternating them to achieve a neat, pleated look.
- The finishing touch: the scarves: Cut a long, narrow triangle of fabric from your scraps. You can finish the edges with pinking shears for a decorative effect. Tie the scarf around the neck of your creations for an authentic final touch.
The result, as shown in unnamed.jpg, is a set of unique decorations that bring a touch of craftsmanship and color into your home. Have fun with your creative project!
What You Need
Before you start, set up your workspace. You will need:
- Eggs of different sizes: (Look for Americana chicken eggs for blue/green shades, Bantam eggs for smaller sizes, or standard organic eggs).
- Food coloring: (Try neon colors for a modern look!).
- Vinegar: Essential for setting the color.
- Markers: To draw facial features.
- White paint pen: For the final decorations.
- Egg stands: You can easily create perfect rings by slicing up a paper towel tube.
- Masking tape: To mask off the doll’s face.
- Shallow dishes and newspapers: To protect your table.
Step-by-Step Guide
1. Selecting the Eggs
The secret lies in the variety. Try to find eggs in 3 or 4 different sizes. Naturally colored eggs (blue or brown) add character, while white or beige eggs are perfect for mimicking skin tones for the faces.
2. The Perfect Boil
Place the eggs in a saucepan and cover with water (at least 1 inch above the eggs). Bring to a boil, then turn the heat down to medium-high and cook for 5 minutes.
- The foolproof test: Lift an egg with a spoon. If the water evaporates quickly (in less than 6 seconds), the eggs are ready. Cool them immediately under cold running water.
3. Masking
Apply a small circle or oval of masking tape to the part of the egg that will be the face. Ensure it is pressed down firmly; this will protect the shell from the dye, leaving a clean, skin-toned area for the features.
4. Artistic Coloring
Create “dye baths” in your dishes by mixing water, a teaspoon of vinegar, and a few drops of food coloring.
- Color Tip: For a vibrant purple, try 7 drops of pink and 1 drop of blue; for neon green, use 4 drops of green.
- Dip the bottom half of the egg and secure it to the edge of the bowl with masking tape. Repeat for the top half once the first side is dry, making sure not to overlap the colors.
5. Final Touches: Decoration
Once you remove the tape from the face, let your artistic side shine:
- Hair: Draw two tufts of hair on the sides.
- Face: Use a fine-tip marker for eyes and lashes, and a red marker for the lips.
- Blush: A dot of pink on the cheeks immediately brings the character to life!
- Details: Use a white paint pen to draw a little knot or floral design under the face.
Extra Tips for Your Blog
- Food Safety: If you plan to eat the eggs, remember to keep them refrigerated until you are ready to display or serve them.
- Sustainability: Have leftover eggs? Use them for an Easter egg salad or as decoration for a themed brunch.
- Engagement: Ask your readers: “What color combinations will you try for your Easter Matryoshkas?” Let me know in the comments below!
Did you like this DIY project? Don’t forget to subscribe to the newsletter for more creative tutorials and sustainable home decor ideas!