
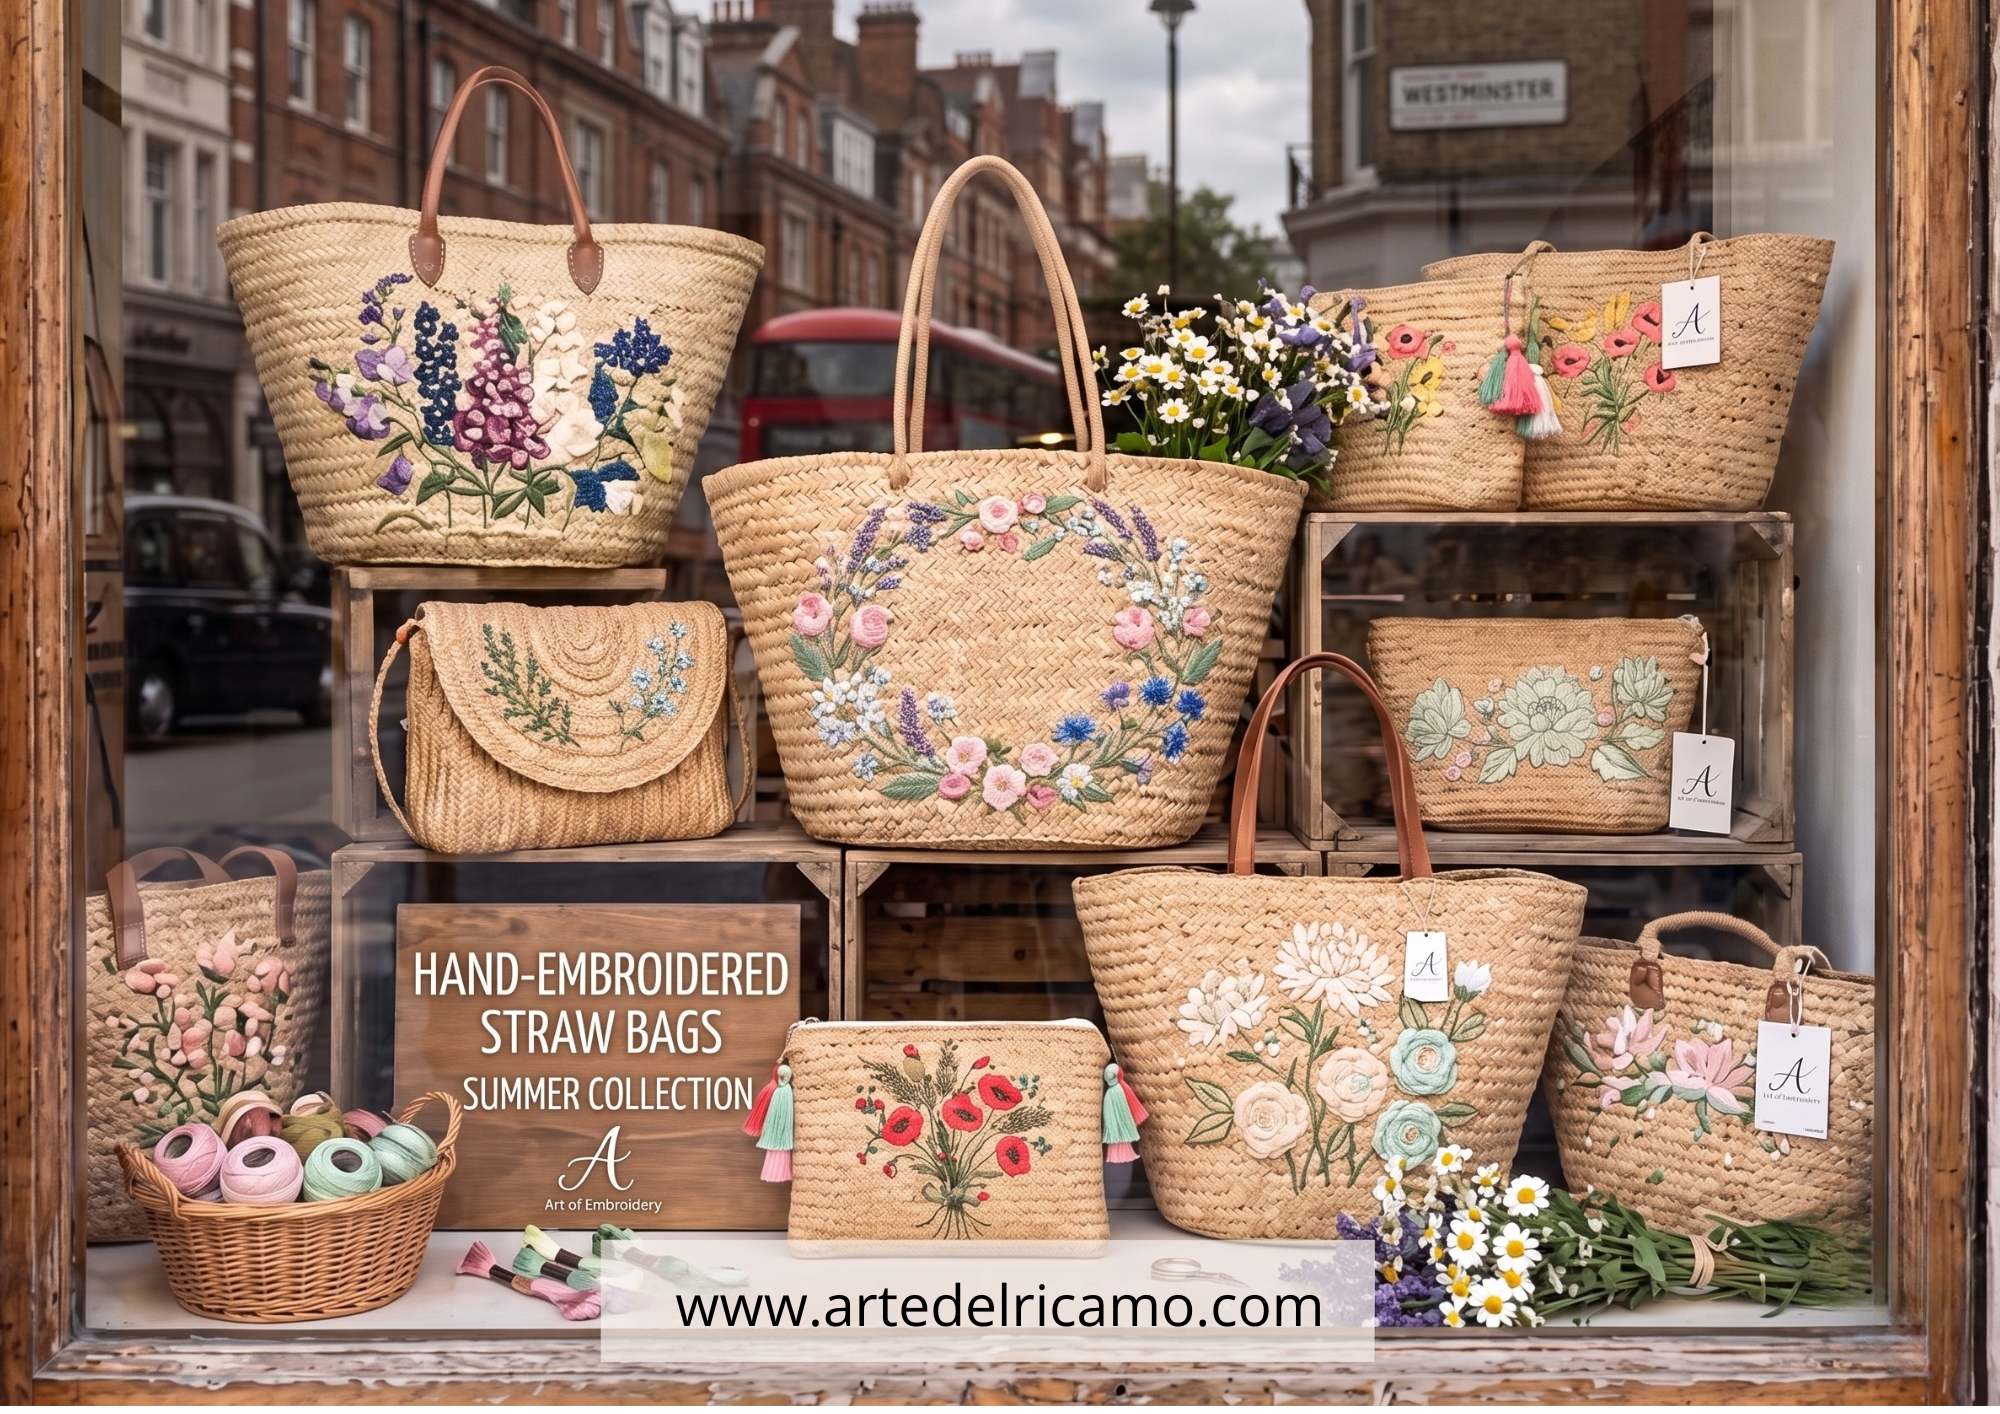
How to Personalize a Straw Bag with Floral Cotton Embroidery
Learn how to customize a straw bag with delicate cotton floral embroidery. Follow our step-by-step guide to craft the perfect handmade summer accessory.
Since summer is just around the corner, there is one accessory that absolutely cannot be missing from our wardrobes: the straw bag. Very useful for an afternoon walk, a day at the beach, a stroll downtown, or a sunset aperitif, the straw bag is the true emblem of summer. But how do we make it truly unique and inimitable?
Today, I have the pleasure of sharing a project with you and all creative embroidery enthusiasts on how to transform a simple straw bag into a unique and trendy summer accessory. It is a step-by-step tutorial that will allow you to create delicate cotton floral embroideries.
I will guide you step by step to customize a straw bag using the wonderful and relaxing art of embroidery, creating delicate floral motifs in soft cotton. This is a project dedicated to creativity and handmade crafts, perfect for adding a touch of uniqueness to our summer outfits.
In my handcrafted bag collections, I have always been careful not only to preserve ancient traditions but also to pay close attention to design and the choice of materials. This is why I believe that projects like this, focused on the use of natural fibers like straw, are truly special. These creations feature a delicate aesthetic, with strong nods to the shabby chic style and the colors of nature, utilizing soft palettes such as antique pink, cream, and sage green.

How do you embroider a straw bag? The charm of this project lies precisely in using natural fibers. Embroidering with cotton threads always brings great emotion and satisfaction. Straw and raffia, with their raw and irregular textures, create a wonderful contrast with the softness and shine of cotton yarn. This project is also a fantastic opportunity for creative upcycling: if you already have an old beach bag and would like to make it unique and special, beautiful, colorful embroidery is the best way to give it a second life.
Materials Needed for the Project
Before starting, let’s set up our workspace. Here is what we will need:
- A straw or raffia bag: Preferably with a weave that is not too tight, allowing the needle to pass through easily.
- Cotton threads: The ideal choice is Pearl cotton (size 5 or 8) or classic Stranded Cotton (Mouliné), using all 6 strands to give the flowers a three-dimensional look. For a perfectly romantic style, I recommend a delicate color palette: dusty pink, mint green, and cream. You can find a wide selection of top-quality threads in our Arte del Ricamo Shop.
- Embroidery needles: Choose needles with a large eye and, if possible, blunt tips (like wool or tapestry needles) so you don’t break the straw fibers.
- Water-soluble embroidery paper (optional but recommended): Essential for transferring the design onto the bag without having to draw directly on the straw.
- Sharp embroidery scissors.
Tutorial: How to Create the Floral Embroidery Step by Step

1. Choosing and Transferring the Design
Let’s start by choosing our motif. For straw, the best designs are those that aren’t too tiny or detailed:
- Wildflowers
- Daisies
- Stylized small roses

Here are some embroidery design ideas that might be useful for customizing your straw bag:

- A branching motif (ramage) of stylized lotus flowers to be positioned in the center of the bag.

- Romantic roses to embroider on the straw bag.

- Delicate daisies as a decorative motif.

- For a clutch or a slightly smaller handbag, a tiny bouquet of flowers.
If you are using water-soluble paper, draw the motif on the paper, cut it out, and secure it to the bag with a few pins or a basting stitch. This stabilizer will act as your guide and, once the work is finished, will simply dissolve with a little water.
2. The Ideal Embroidery Stitches
To customize a straw bag, we need to use stitches that create volume and stand out on the rough surface:
- Lazy Daisy Stitch (Punto Margherita): The undisputed star of the embroidery, used to create flower petals simply and quickly. Use cream or dusty pink to craft delicate corollas.
- French Knot (Punto Nodo Francese): Perfect for making the centers of flowers or small, three-dimensional buds.
- Chain Stitch or Stem Stitch (Punto Catenella o Punto Erba): Use mint green to embroider the intertwined stems and leaves that connect the various flowers, creating a harmonious garland.
3. Executing the Embroidery
Thread the needle and tie a small knot at the end of the thread (on straw, a knot on the back is perfectly fine, as it will remain hidden or be covered by a lining). Start embroidering by following the outline. The secret here is a gentle touch: do not pull the thread too hard, otherwise you risk breaking the fibers of the bag. Let the cotton rest softly on the surface. Work calmly, enjoying every single stitch.
4. The Finishing Touches
Once the floral embroidery is complete, if you used the water-soluble stabilizer, lightly dampen the area with a wet sponge to dissolve it. Let the bag air dry. For an extra touch of class, you can line the inside of the bag using a remnant of raw linen or cotton, hand-sewing it along the upper edges. This will protect the back of the embroidery and make your bag a true masterpiece of artisanal tailoring.
Further Ideas to Decorate Your Bag
If you wish to enrich your creation even more, you can add some appliquéd details:
- Frayed linen ribbon bows attached to the handles.
- Small, colorful tassels made with the same cotton threads used for the embroidery.
- Vintage charms or buttons sewn into the center of the flowers.
Customizing a straw bag with embroidery is a wonderful project that combines a love for traditional techniques with the desire to have a modern, sustainable, and absolutely unique summer accessory.
Are you ready to put your creativity to the test? Choose your favorite colors, prepare your needle and thread, and let yourself be inspired. Don’t forget to share photos of your embroidered bags with us in the comments below or on our social media channels!
Happy embroidering and have a creative summer!